
How to Create a WSL Development Environment for Visual Studio Code
Get a Smooth Developement Experience in VS Code!

Introduction
Linux Operating Systems have already gained popularity as it is Open-Source and are good for programming. Even when we deploy any app in any cloud services like Azure, Heroku, or AWS; they mostly use Linux Machines. Suppose you decided to try out Linux but you have a Windows laptop. Do you need a Linux Machine for it? The answer is simply NO! You can try out Linux by installing WSL on your computer. Here I will discuss about:
What is WSL?
How to Install WSL?
How to Install Visual Studio Code?
Extensions needed for using WSL in Visual Studio Code.
Testing the WSL Environment in VS Code.
So, fasten your seatbelts! we are going to start our journey.
What is WSL?
The full form of WSL is - Windows Subsystem for Linux. It is a feature of Windows which gives you the ability to run a Linux Environment without the need for a separate virtual machine or dual booting. This is a really good feature for those who love the Linux Environment mostly for Programming and Development. Linux doesn’t give you the advantage of installing Windows apps. That’s why when someone switches to Linux from Windows, they face great difficulties in adopting Linux for daily usage. We don’t always use computers for programming, isn’t it? WSL fixed this problem by giving the Linux Environment in Windows so that you can enjoy the power of both Linux and Windows.
How to Install WSL?
Enabling the Windows Features
Before installing WSL in Windows, we must follow some additional steps. First, we have to enable some features of Windows. For this, open the Start Menu and search for Turn Windows Features on or off.

After clicking on it, you will see a dialog box visible just like below. Now check the box for Virtual Machine Platform and Windows Subsystem for Linux from it.

After that, click OK and restart the computer. It may take some time, so keep patience.
If your computer completed its bootup process, you are ready to go for the next step.
Installation
There are two methods for installing WSL in Windows.
Install from the Microsoft Store, or
Install using the Windows Terminal.
Installing from Microsoft Store
To install WSL from Microsoft Store, Open Microsoft Store and search for Windows Subsystem for Linux.

Now you have to install this. As I already installed it, it shows the Open button to me. For those who haven’t installed it yet, the Get button will show here.
After the installation is complete, you have to install a Linux Distro. Here we will install Ubuntu. For this, again search for Ubuntu in Microsoft Store.

There are multiple versions of Ubuntu available. Choose the above one, it will install the recent version of Ubuntu available in the store.
If everything is fine, open the start menu and search for Ubuntu and Voila! You will see Ubuntu as an app.

Install using Windows Terminal
This is one of the fastest methods till now. Open the Start menu and search for cmd. you will see Command Prompt in the result. Run it as an Administrator.
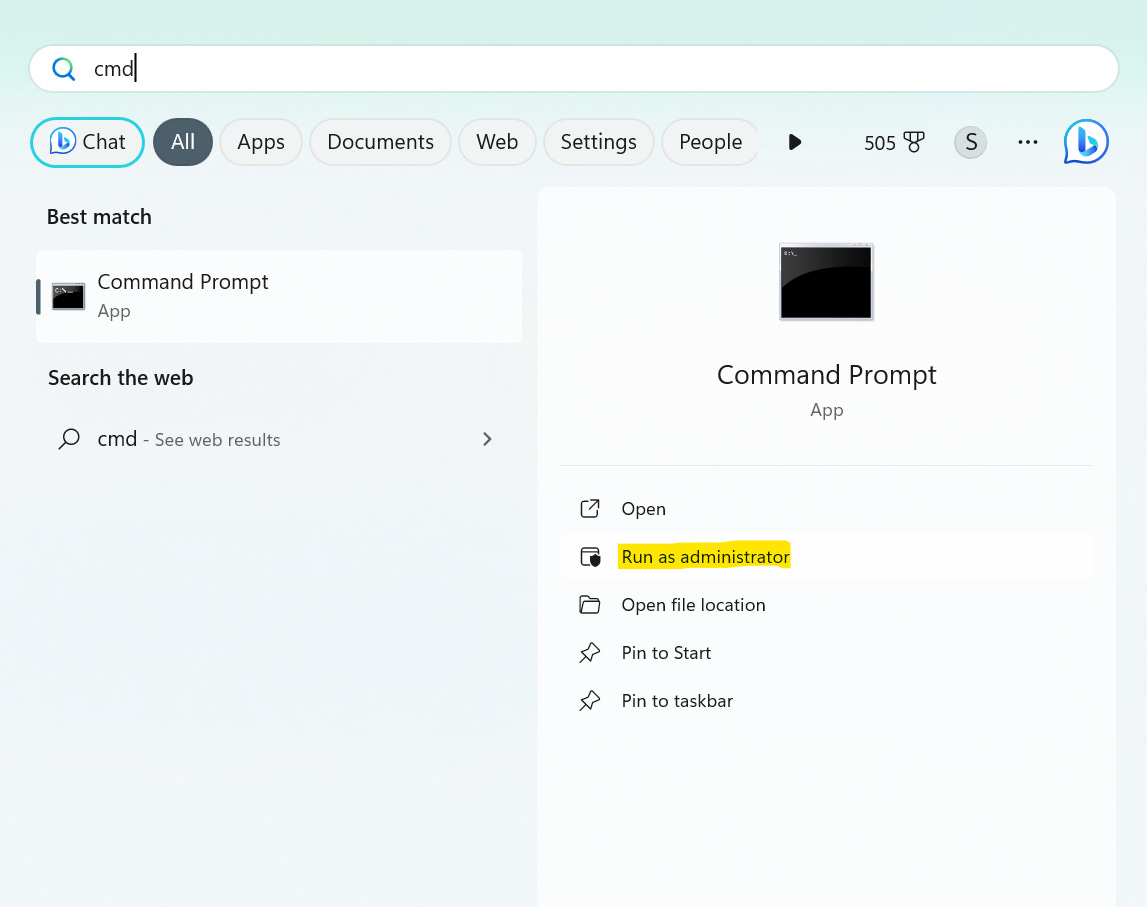
After that, You will get a pop-up. Click Yes.
Now you have to run the below command in the terminal.
wsl --installThis command will take care of everything - from installing the WSL to Ubuntu. You don’t have to install Ubuntu after the installation of WSL manually. It will do all of it.
After the successful execution, you will get the same result if you search Ubuntu in the Start Menu. Now it is your choice which one will you use.
Now you have to run Ubuntu. You will see a terminal show up. It will take some time to initialize. After that, it will ask you for a username and password.
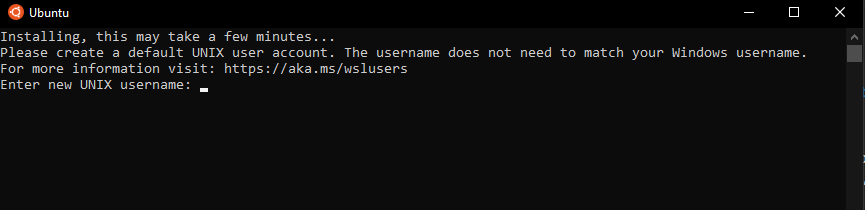
After everything is done, you will see the Ubuntu up and running. Keep this terminal running. We again came to this terminal after installing Visual Studio Code and WSL extension.
How to Install Visual Studio Code?
Visual Studio Code is a simple but powerful IDE for all sorts of tasks. It’s installation is also simple. Just go to this website and download the setup file for Windows. For the installation, follow this guide. If you need a video tutorial, then check out this video created by GeekyScript:
WSL Extension in VS Code
After the installation of the VS Code, you have to install the WSL extension. This extension will allow you to use the Linux environment in VS Code. For this just go to the Extensions Marketplace and search for wsl. The result will look something like below.

If you are done, now let’s test the Linux environment in VS Code.
Testing the WSL Environment in VSCode
Now switch to the Ubuntu Terminal. Python Interpreter comes pre-installed in Ubuntu, so you don’t have to worry. Let’s see the version of Python. Run the command below.
$ python3 --versionFor me, it shows that the version of Python is 3.10.12.

Now, let’s create a folder in which you are going to create your working directory. As we are going to use WSL in VS Code, let’s create a folder with the name VSCodeProjects and navigate to it.
$ mkdir VSCodeProjects
$ cd VSCodeProjects
Now we are going to create a working directory. Create a folder named WSLDemo and navigate to it as we did previously.
$ mkdir WSLDemo
$ cd WSLDemo
Now let’s create a virtual environment. For this, you have to run two commands below.
$ pip install virtualenv
$ virtualenv .venv
When it’s done, just open the working directory in VS Code.
$ code .It will first download the necessary files for running the VS Code in WSL. Then it will open the editor to you.

Now you are ready to test some code in Linux. Create a file named main.py in the working directory and try to print Hello World! in the terminal. You will see that the code was executed successfully.

Now you are ready to start your development in the Linux Environment.
Conclusion
There are so many benefits to using the Linux Environment in Development. Most of the necessary packages come pre-installed. So, you don’t have to face difficulties. Previously, we saw that Python Interpreter comes pre-installed in Ubuntu. If you already work with Linux, you will notice that you will face fewer problems in VS Code than in Windows. There are so many benefits you will get while working with Linux.
So, that’s all for now. I will come back sooner with another post. Until then, stay tuned! I also write articles in Medium. You can visit my Medium profile using the below button.